

Stovetop percolators make me think of cowboys drinking black coffee out of a tin cup by the campfire in the early morning while their beaten-up old percolator bubble on the hot stones. The simplicity of a drip coffee maker forced the percolator, which made strong and occasionally bitter coffee, to the margins, where it was once among the most popular ways to make coffee.
A stovetop percolator can appear intimidating; warnings about over-extracted or burnt, sour coffee may tempt you to try a ‘easier’ way to make coffee; however, those who are familiar with the tips and techniques for making the best cup of percolator coffee swear by it.
How to use a stovetop percolator to make coffee
To make coffee with a percolator, just adhere to a few easy procedures:
Step 1: Grind and measure the coffee beans. 20 to 22 grammes, or around two tablespoons, of espresso beans should be measured out. Grind the coffee beans into a medium-coarse texture, about the same as what is required to prepare one espresso shot.
Step 2: Heat water in a different kettle. After that, pour the hot water into the percolator’s base.
Step 3: Put coffee grinds in the filter basket. Shake it a bit to spread the grounds evenly. The filter basket should then be inserted into its compartment.
Step 4: Screw the base onto the side with the spout. The bottom will be hot, so use caution. To be safe, use dishrags or oven mitts.
Step 5: Set the percolator near the heater. the hob to a medium heat setting. Instead, according to the directions provided by the manufacturer if you’re using a battery-operated coffee percolator.
Step 6: Start the coffee. Once you begin to hear the sputtering sound, percolation has started. In a percolator, hot water is forced through a tube under pressure, slowly soaking the coffee grounds. Keep a watchful eye on the temperature of your water. Reduce the heat if your coffee starts to foam out the top. Heat it up if it seems to be moving slowly.
Step 7: Turn off the heat source in the percolator. Remove the coffee from its heat source as soon as it has finished percolating.
Step 8: Throw out the grounds. Throw away the used coffee grounds before serving it, being cautious not to burn oneself on the hot percolator.
Step 9: Pour coffee into cups. Once it has reached a temperature that is suitable for drinking, pour the brewed beverage into your preferred mug and savour a freshly made cup of coffee.
Cleaning a Percolator

Percolators require similar care when cleaning as drip coffee makers or Keurig devices do. After brewing is the best time to clean a percolator. If the coffee grounds are permitted to dry in the basket, they can transform into a dense cake.
Similar to leaving freshly brewed coffee in the vessel overnight, doing so can discolour the walls and change how the coffee tastes when it is brewed again. The brewing baskets, the water chamber, and the stem connecting them should all be cleaned with warm, soapy water, washing softly with a sponge as required.
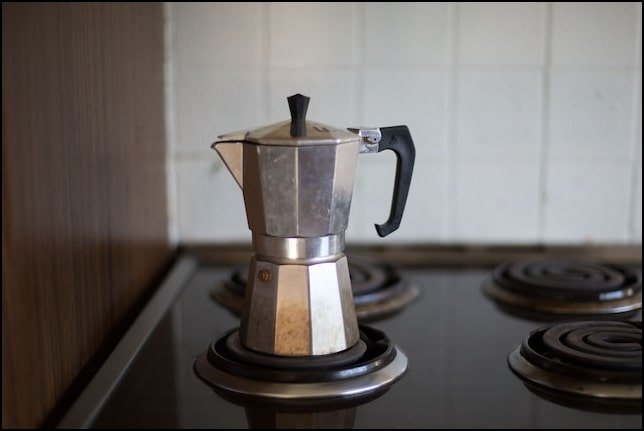
A stovetop coffee percolator: what is it?
In a stovetop coffee percolator, freshly brewed coffee is continuously soaked into the coffee grounds. This brewing technique gives you more control over the final cup of coffee. Coffee made using a percolator is known for its strong, rich flavour.
A stovetop coffee percolator’s essential parts are as follows:
- Percolator base
- Coffee grounds basket
- Stem
- Top
Coffee grounds are kept in a basket inside the percolator base, which also houses the water used to make the coffee. While the stem passes through the coffee grounds baskets and links the percolator base to it. The percolator’s top will block the flow of hot water through the stem and out the percolator base.
Percolator coffee: how do you know when it is done?
Due to the fact that you must manually turn off the heat, keeping an eye on your stovetop espresso percolator is essential. Otherwise, you run the danger of over-extracting the beans, which will produce percolator coffee that is acidic and harsh.
A percolator coffee that is evenly balanced will be produced after 7 minutes of brewing. With a stove-top coffee percolator, you can brew lasting up to 10 minutes. If you add any more, your coffee will change from being quite bold to bitter. Use coarsely ground coffee for a more “forgiving” brewing process that will give us more time to prepare the coffee.
How well does a percolator make coffee?
The control that a percolator brewing process offers is the main advantage of utilising a stovetop coffee percolator. Since the same coffee grounds can be used repeatedly to create hot percolator coffee, you are essentially pulling more coffee out of the grounds.
With a percolator, you can consistently make strong, powerful coffee, but the consistency depends on who is making the coffee. The stovetop coffee percolator boiling method is typically less difficult to get wrong than the pour over or drip coffee making method, yet requiring less ability than an espresso coffee press.
Conclusion
The coffee should be audibly “jumping” around. Start the percolator on medium or medium-high heat if you’ve got a hob. Reduce the heat whenever you hear the water begin to bubble up until you see it “perk” every 2 to 3 seconds. Your coffee ought to be ready after 5 to 10 minutes if you leave it like this.